
How to Trade Order Blocks Step by Step
Key takeaways: An order block is the last meaningful candle or consolidation area before a strong impulsive move. To trade one, start from a higher timeframe, mark the candle or area of consolidation that caused the move, confirm that price broke structure, wait for price to return, then enter only if the retest holds. The best order block setups have clear displacement, nearby liquidity, a fair value gap or imbalance, and enough room to target the next opposing liquidity area. For Tradeify futures traders, the goal is not to mark every possible block. It is to trade only clean blocks where entry, stop-loss, target, and account risk are obvious before the trade is placed.
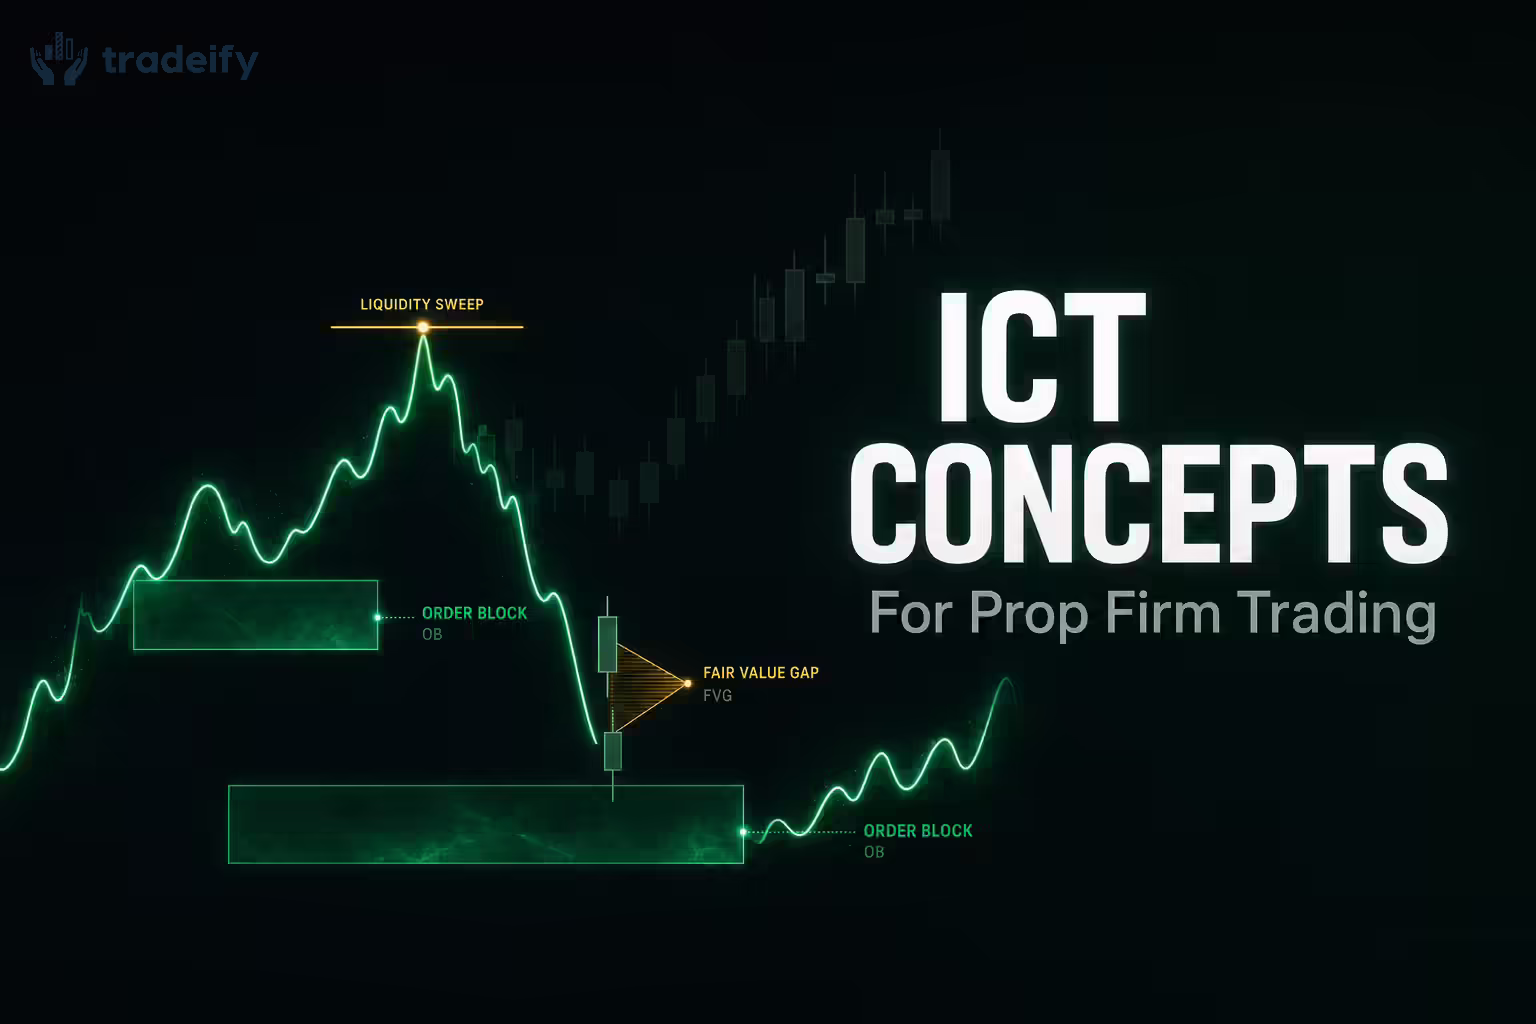
What Is an Order Block?
An order block is a price area where buyers or sellers likely built a large position before an impulsive move. In simple terms, it is the last bearish candle before a strong bullish move, or the last bullish candle before a strong bearish move.
Traders watch order blocks because price often returns to the area before continuing in the direction of the original move. That return is where many traders look for an entry. The idea is straightforward: if a large move started from that area once, the same area may still matter when price comes back.
How to Identify a Valid Order Block
Start with the move, not the candle. A random candle is not an order block just because price reacted near it. A useful order block should be followed by a strong impulsive move that changes market structure.
- Find a clear swing high or swing low on the chart.
- Look for a strong move that breaks that level.
- Go back to the last opposite candle or small area of consolidation before the move.
- Mark that candle or consolidation zone as the possible order block.
- Check whether price left an imbalance, fair value gap, or clean displacement away from the zone.
A bullish order block indicates there may be buyers below current price. A bearish order block indicates there may be sellers above current price. The stronger the breakout from the block, the more attention the area deserves.
How to Draw an Order Block on Your Chart
Use the full candle range when you want a safer zone. Draw from the wick low to wick high of the last opposite candle. Use the candle body when you want a tighter, more aggressive entry zone. If the order block is part of a small consolidation period, mark the full consolidation area instead of one candle.
A practical rule: if the candle has a long wick, include the wick. If the move started from a tight base with several small candles, mark the whole base. If the candle is clean and decisive, the body or 50% mean threshold can be used for a tighter entry.
How to Trade Order Blocks
The basic order block trading process is simple.
- Choose your higher timeframe bias, such as the 1-hour or 4-hour chart.
- Mark a bullish or bearish order block that caused a real break of structure.
- Wait for price to return to the zone.
- Look for confirmation on a lower timeframe, such as a rejection candle, lower-timeframe break of structure, or failed push through the zone.
- Place the stop beyond the far side of the block.
- Target the next liquidity area, old high, old low, or opposing order block.
For a bullish setup, price should return to a demand-side block and reject lower prices. For a bearish setup, price should return to a supply-side block and reject higher prices. Avoid entering just because price touches the zone. The retest still needs to show that buyers or sellers are defending it.
Order Block vs Supply Zone vs Support and Resistance
| Concept | What it means | How traders use it |
|---|---|---|
| Support and resistance | A level where price reacted before | Used as a general reaction or liquidity level |
| Supply and demand zone | A broader area where buying or selling overwhelmed the other side | Used to frame possible reversal areas |
| Order block | The candle or consolidation area before an impulsive move | Used as a more precise entry zone after structure breaks |
The difference is precision. Support and resistance often marks where price reacted. Supply and demand marks a broader imbalance. An order block tries to mark the origin of the move that created the imbalance.
Best Timeframes for Order Block Trading
Use higher timeframes to find the zone and lower timeframes to time the entry. Many futures traders use the 4-hour or 1-hour chart for bias, the 15-minute chart for structure, and the 5-minute or 1-minute chart for execution. The lower the timeframe, the more false blocks you will see.
For Tradeify accounts, this matters because overtrading small blocks can damage consistency and drawdown. A cleaner approach is to wait for one or two higher-quality zones during high-volume sessions, especially around the New York open for ES and NQ.
Order Block Trading Risks
Order blocks fail often when traders mark too many zones, trade against the higher timeframe, or ignore liquidity. A block sitting directly in the path of a stronger trend can be run through quickly. A block with obvious stops just behind it can also act as inducement before the real reversal.
Risk should be defined before entry. If the block is too wide for your account size, reduce contracts or skip the trade. Do not widen the stop after entry. That turns a planned order block trade into a hope trade.
FAQs About Order Blocks
How do you confirm an order block?
Confirm an order block by checking that it caused displacement, broke market structure, and held when price returned. Lower-timeframe confirmation, such as a rejection or micro break of structure, can help filter weak zones.
What is the difference between an order block and a supply zone?
A supply zone is a broader selling area. A bearish order block is usually the specific bullish candle or small consolidation area that started the selloff. The order block is more precise, but it still needs context.
Do order blocks work in forex, crypto, stocks, and futures?
The concept can be used across markets, but execution changes. Futures traders have centralized volume and clear session behavior, while forex and crypto traders often rely more on price structure and liquidity sweeps.
How does ICT define order blocks?
ICT-style traders usually define a bullish order block as the last down-close candle before an up move that displaces price and breaks structure. A bearish order block is the last up-close candle before a down move that does the same.
Are order blocks profitable?
Order blocks are not profitable by themselves. They become useful when paired with trend bias, liquidity, confirmation, and strict risk management. The edge comes from the full process, not from drawing a box.
Educational note: This article is for general trading education and is not financial advice. Futures trading involves substantial risk.
.svg)
.svg)
.svg)


.webp)

